As an eLearning professional who extensively uses Canva to create various educational materials, I’ve discovered its immense potential in crafting engaging and effective worksheets for students. Over the years, not only have I integrated Canva into my workflow in numerous ways, but I’ve also seen many of my teacher colleagues turn to this versatile tool for their classroom needs (more than 25 million teachers and students use it).
In this article, I’ll guide you through a step-by-step process to harness the power of Canva for quickly and easily making quality, effective worksheets. Whether you’re new to this platform or looking to refine your skills, you’ll learn how to design worksheets that are not only visually appealing but also pedagogically sound, enhancing the learning experience for your students. Don’t worry, you don’t need any technical knowledge because Canva does the hard work for you.
Don’t Have a Canva Account Yet?
The first thing to do, if you don’t already have a Canva account is to make one. This will allow you to make and save your projects.

It’s free to create a Canva account, but I do want to point out that with an upgraded Canva Pro account, you can take your creations to a whole new level with its unlimited features and premium content.
Once you’ve created your Canva account, the worksheet creation can begin!
You’ll sign into your account, and you’ll see a left sidebar that includes tools and options to use in your account. One of those options is projects. Clicking that will allow you to find projects you’ve made and that others have shared with you, in a neat and organized folder. Choosing “Create a Project” will allow you to create a class or even a worksheets folder, so you can begin the design process.
Step #1 – Create a Canva Design
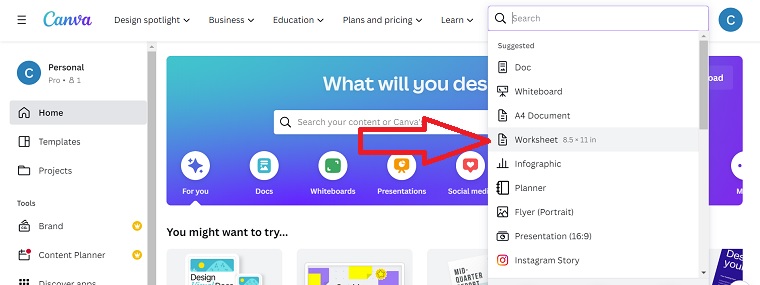
When you’re in your Canva account you just need to find the button that says, “Create a Design.” From there, since you’re making a new worksheet, you’ll pick the worksheet option from a list of designs that are offered.
If you don’t initially see “Worksheet” in the drop-down menu, don’t worry. The list you initially see are some suggestions of things you might make from Canva. Just type “Worksheet” into the search bar at the top of the drop-down box, and you’ll receive the worksheet options instantly. There is more than one worksheet option, but the standard “Worksheet” is the standard size you’d likely use for class. Alternatively, you can choose the US Letter option, which would be the same size.
Tip – When you’re choosing the worksheet template you want to use you can use your mouse pointer to hover over the options to see the size for each option.
Step #2 – Choose Your Design Elements
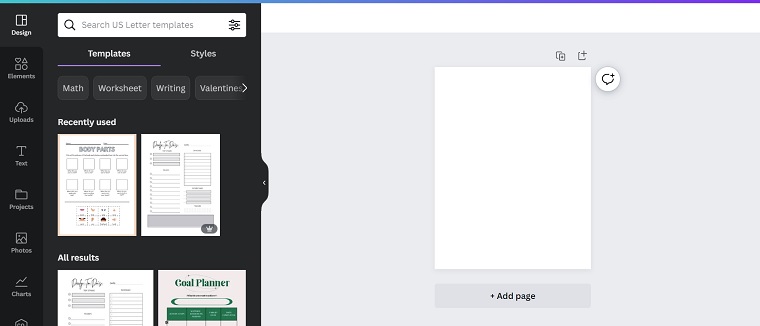


Once you opt to create your new worksheets, you are going to have two options. You’ll be able to start your worksheet on a blank page to create the design you want, or you can choose from a set of Canva templates that are designed for you and ready to go.
There is no wrong answer here. It comes down to a matter of preference. The good news is that if you don’t have a design in mind, Canva has a wide selection of professional-looking templates that will be suitable for all kinds of worksheets.
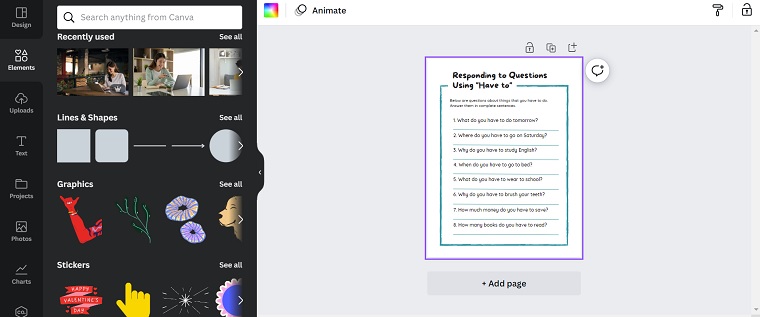
Step #3 – Add the Text
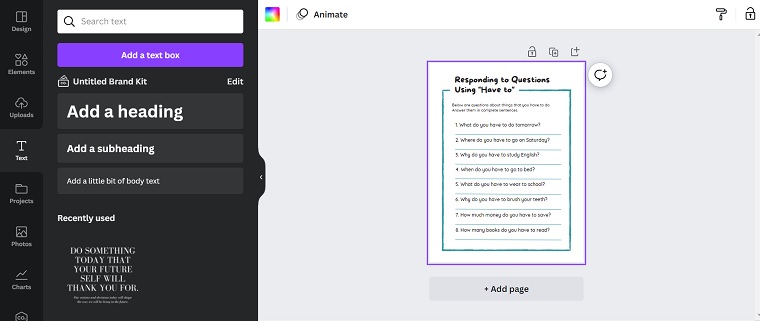
Now that you have chosen a template or designed something on your own, it’s time to add the text that the students will be reading and/or the questions they will be answering. To do this, you’ll just choose the “Text” option on the sidebar. You’ll type your worksheet content right there. If you need to add headings, you can do that by choosing the “Heading” option that appears in the drop-down options.
All of your text ends up in handy boxes, which allows you to stretch or shrink text, as needed. You’ll also be able to move the text around the page so that your worksheet has all the elements you want, in the places you want them. You can change the font, font size, font color, and text elements using the bar above the design space.
If you want to change the text for example, you’d click the font drop-down to get started. This will bring up a section of the left sidebar that shows you all of the available fonts with a small preview. While some fonts are only available for Canva Pro users, there are many free options available.
After you have your font chosen, you can click the Effects button if you want to give your headers (or other text sections) some flare. Some options include turning text neon, curving your text, or creating a shadow or echo effect.
Step #4 – Add Images
If you want to add any images to your worksheet, now is the perfect time to do that. You just need to choose one of the image options (e.g. photos, charts, etc.) from the left sidebar. With Canva, you’ll have the option of adding your own images to your worksheets or you can choose from the Canva library, which currently includes more than one million stock images.
Whether you have something lesson-specific in mind or want to add something fun to your worksheets, you’ll have the chance to do that with images. If you don’t have your own, the Canva library is sure to have what you need.
At this point you’re almost done. In fact, depending on the worksheet you’ve created, you might be ready to save and begin the printing process. If it’s not perfect just yet you still have a few more options of things that you can do.
Step #5 – Add Shapes
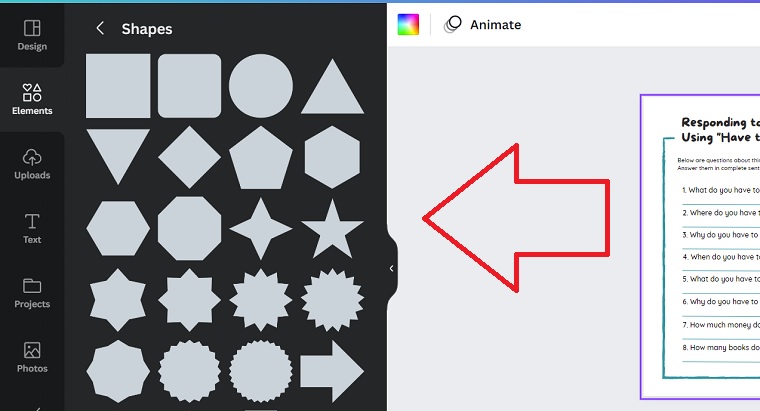
Depending on the class, the addition of shapes could be helpful. You don’t have to worry about creating your own images – Canva has them ready to go.
So, whether this is a geometry worksheet or you’re having your class color worksheets adorned with Christmas ornaments, you’ll have what you need for your worksheet!
You’ll just need to search “Shapes” option in the left sidebar. From there, it’s as easy as choosing the shape you want to add to the worksheet and dragging it to where you want it.
Step #6 – Download and/or Print
If you’re making a standard non-interactive worksheet, it should be ready to go at this point. Keep in mind, that if something doesn’t look right you can adjust the elements so that it looks perfect. Once you’re happy with the results, you’re finished! You can download and print your worksheets and you’ll be grading them in no time!
Things to Keep in Mind
This was just a simple tutorial on how to make standard worksheets with Canva, but you can do so much more. You can make fillable or interactive worksheets if you want to share your worksheets online or virtually, as opposed to traditional in-class worksheets.
With interactive worksheets, you can go as far as adding video elements and other fun features.
If you’re adding your own pictures (on any of the worksheets) keep in mind that the final, printable product will be affected by the quality of images that you use.
In other words, if you add an image that is grainy or unclear for some reason it may be reflected in the final product.
For that reason, if you have an image you want to use that’s not good quality, you might want to consider a quick image search through the Canva library as you might find something that will work. This will help to ensure that your worksheets are the highest quality.
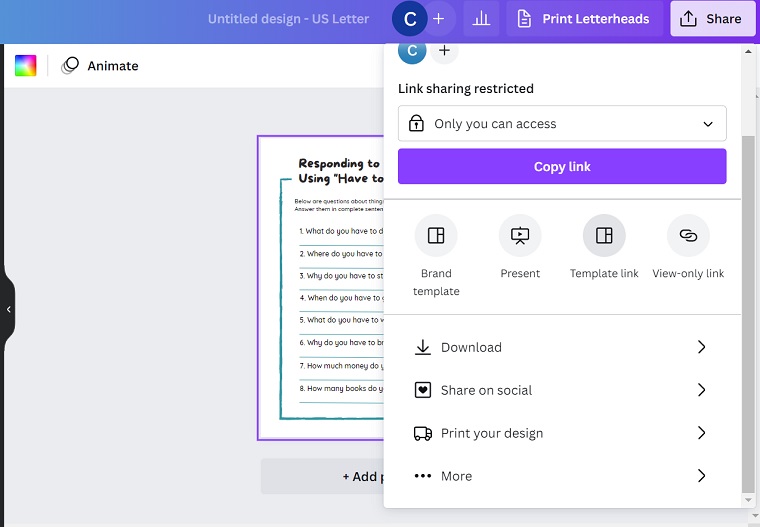
With Canva, you can create worksheets with anyone you want. So, if you share a classroom with another teacher or you have a teacher’s assistant, you can click the “Share” button in the top right corner to get a variety of options. You can add people or groups to share the worksheet with. You can also restrict the link so only those you want to see the worksheet or project, can see it. You can even share your worksheet on social media through the share section.
If you’re a Canva Pro user, you’ll have even more options for designing your projects.
One of the coolest features is the ability to resize your project even after you’re done. If you need a custom size or things don’t look quite right in the size you designed, you can just choose this option and put in the dimensions you want for most of the available project types.
As you can see, creating worksheets on Canva for free is simple. You only need a basic amount of knowledge and to know what you want, and you’re ready to design.
The kids in class will be sure to love the new worksheets and you can rest easy knowing you made them without spending too much time or money.
Once you make your first worksheet, you’ll see how easy it is. And once you do, you’ll see it’s so easy, you’ll be making more in no time!
Click here to try Canva Pro for free today.
Scott is also a contributor to numerous top industry publications, including eLearning Industry and the TalentLMS Blog, as well as a trusted expert source whose analysis has been quoted and referenced in the LA Times, Fox Business, Houston Chronicle, NEA Today, and others.