PowerPoint is a great, easy-to-use program for creating online course modules, school projects, business trainings, tutorials, and a range of other presentations. In fact, a recent survey found that 69% of instructional designers use PowerPoint at least once a month as they create their online courses and video lectures. However, some of the less tech-savvy users may struggle with figuring out how to perform certain tasks with PowerPoint, like adding in audio and voiceover.
When you add audio to a PowerPoint presentation, it can really help elevate it and add an extra layer of polish to it.
The good news is it’s actually pretty easy to add audio and voiceover to PowerPoint slides in some easy-to-follow steps. There are some built-in options to record audio within PowerPoint itself, or you can use a free screen recording PowerPoint add-on like VEED to record your presentation on your computer screen with advanced features while you talk over and record the entire thing to easily share with others.
In the guide below, I’ll show you exactly how to add audio to PowerPoint with multiple free and paid options depending on your specific needs.
The Easiest Way to Add Audio to PowerPoint Presentations
VEED is the fastest and easiest way to make high quality, professional videos for eLearning, business training, sales presentations, and other applications.
If you’re looking for a super easy way to quickly add audio and voice to a PowerPoint presentation, VEED is a good option.
VEED is a screen recording tool that has screen recording features, allowing you to easily play your PowerPoint presentation while adding a voiceover or your own audio of choosing. You can fine-tune the final product with their video and audio editing tools, and then save and share the PowerPoint with others. You can even add in a speaker bubble to your presentation if you want with your webcam.
VEED includes a free plan as well as some other affordable plans that have even more features.
Click here to learn more about VEED.
How to Add Your Voice within PowerPoint
While screen recording with a tool like VEED is a simple way to add your voice to a PowerPoint slideshow, the program itself has some built-in options for doing so as well. Below, I’ll be breaking down how to record audio within Microsoft PowerPoint. Though it might sound tricky, it’s actually a very simple process.
1. Connect a Microphone
The first thing you’ll need to do in order to record your own voiceover for your PowerPoint presentation is to connect the necessary equipment.
This will usually involve connecting a standalone microphone or some other recording device, like a gaming headset with a mic equipped.
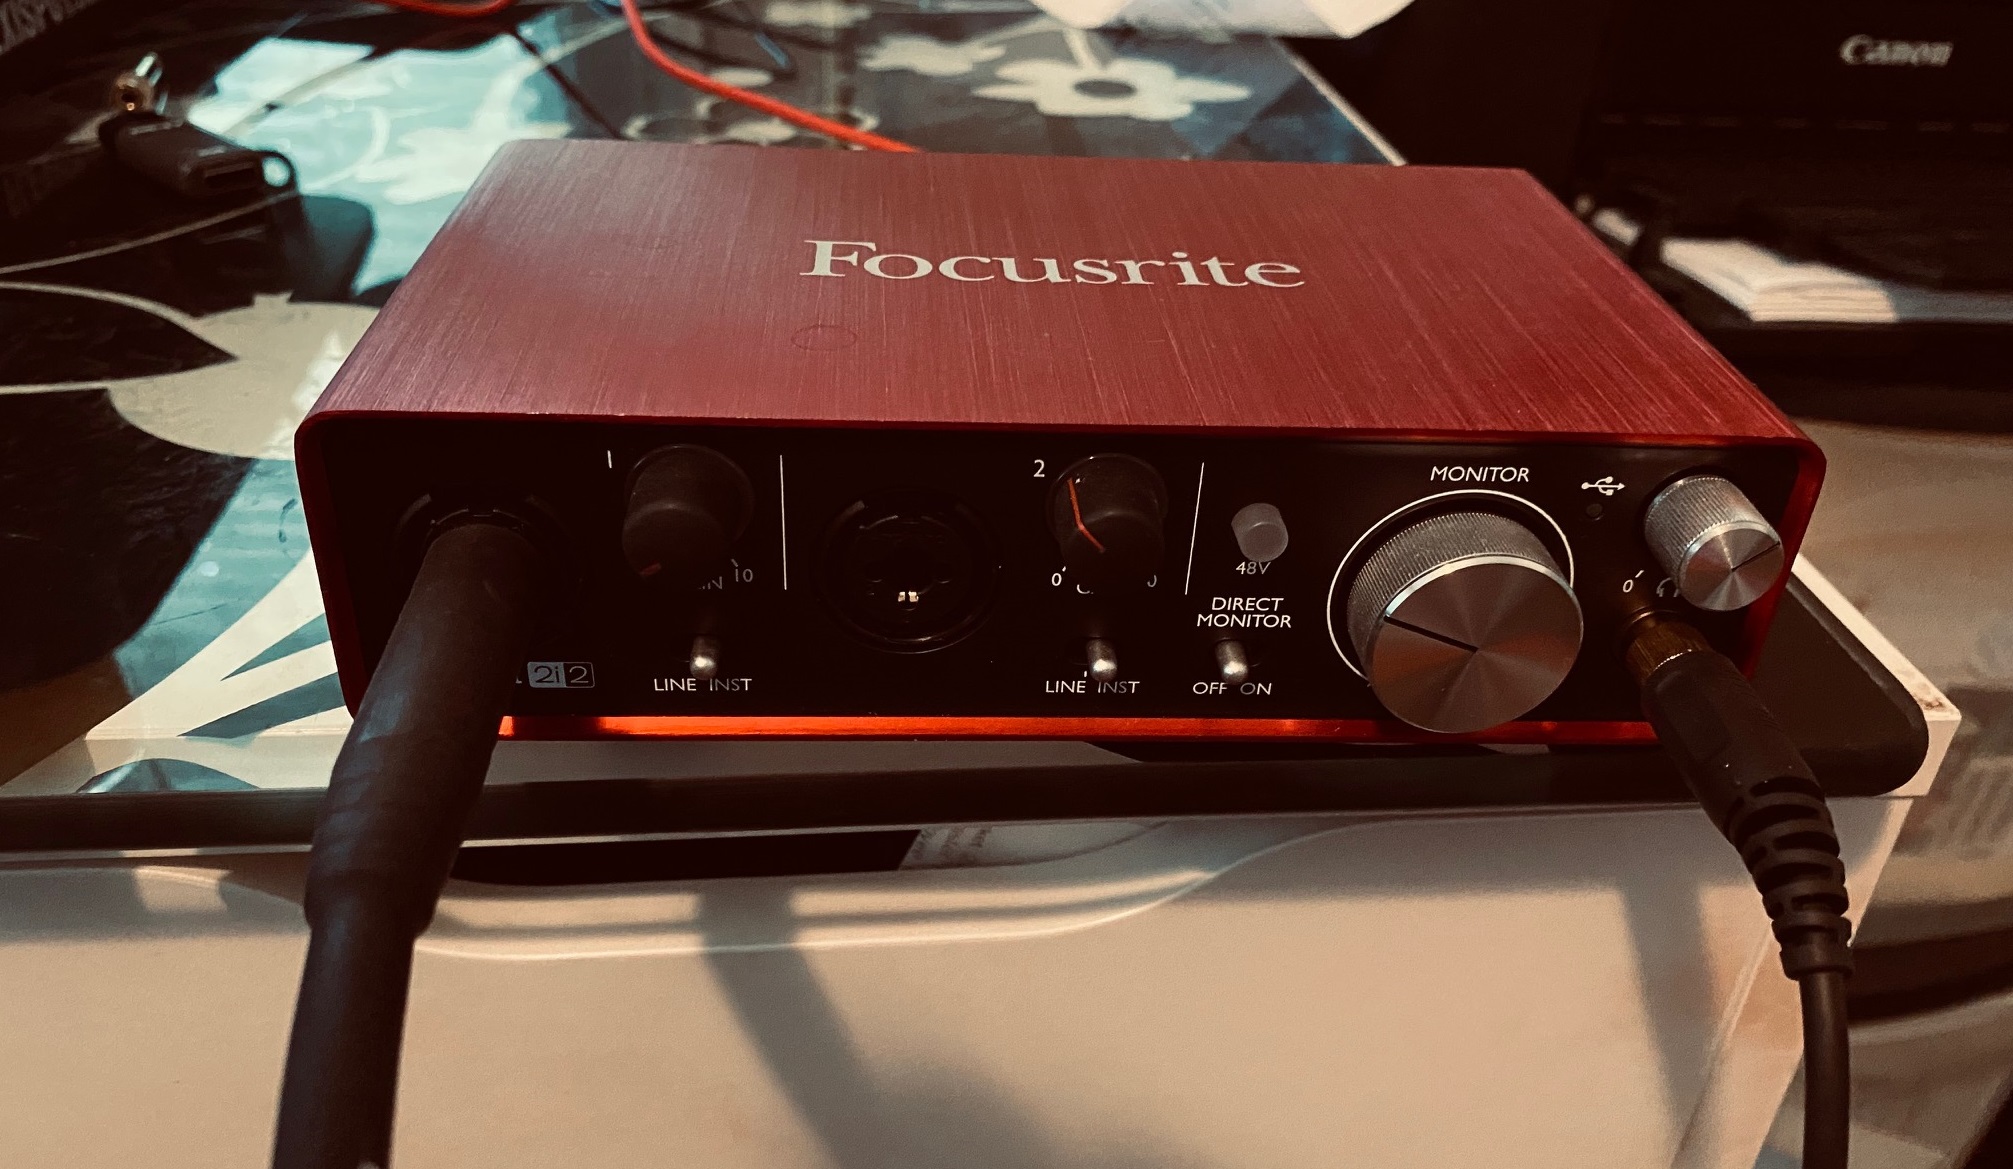
You can use any USB-compatible microphone, which ranges in price from as low as $20 to several hundred dollars. Or if you have an audio interface, you can plug in your microphone through there.


- Next, power on your USB mic and make sure it’s recognized by Windows (you’ll see ‘USB Mic’ listed under Recording Devices)
- Right click the speaker icon in your Windows Notification Area
- Click Recording Devices> Double click on USB Mic
- Under Speaker Properties ensure that “Listen to this device” is checked off.
- Next click Properties> Listen> and check off “Place volume icon in the notification area.”
2. Set Your USB Microphone As the Input Device
Now that your microphone is connected and recognized by Windows, it’s time to set it up as the input device so you can record your own audio with it.
Luckily, Microsoft PowerPoint has made this process very simple, so users of all skill levels should be able to accomplish what needs to be done.
Just open the Sound Settings, go down to Input, click the box that says “Choose your input device,” and just choose your microphone.
3. Practice What You Will Say Before Recording
Now that you’re all set up, it’s time to practice what you’ll say in your video presentation.
Practice is one of the most important steps for how to narrate a PowerPoint professionally.
If possible, try recording yourself on the same voice over microphone you plan on using. This will help acquaint you with how PowerPoint will read back your voice when you record (different microphones often produce different sounds when PowerPoint reads back the audio).
Make sure to record at least 5-10 seconds of audio for PowerPoint to process in the background.
4. Record Audio within PowerPoint
PowerPoint has options within its platform that let you record and add audio to your presentation.
Here’s how to add voice to PowerPoint using its built-in features for recording audio.
Recording an Audio Narration For the Entire Slideshow
If you prefer to simply record a single audio narration for your entire slideshow, then this is quite simple to do.
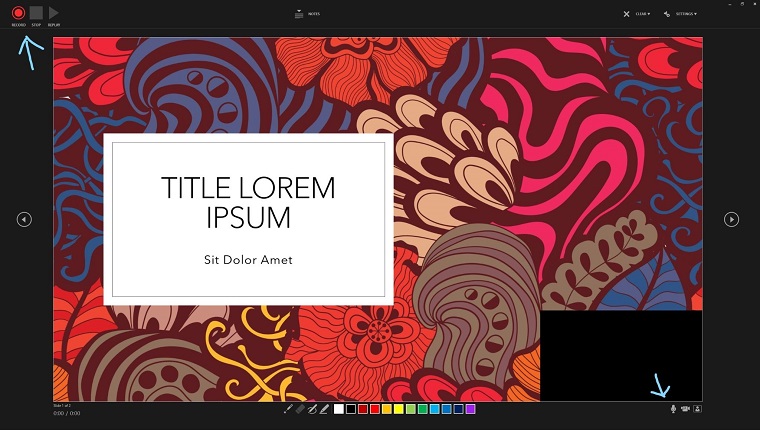
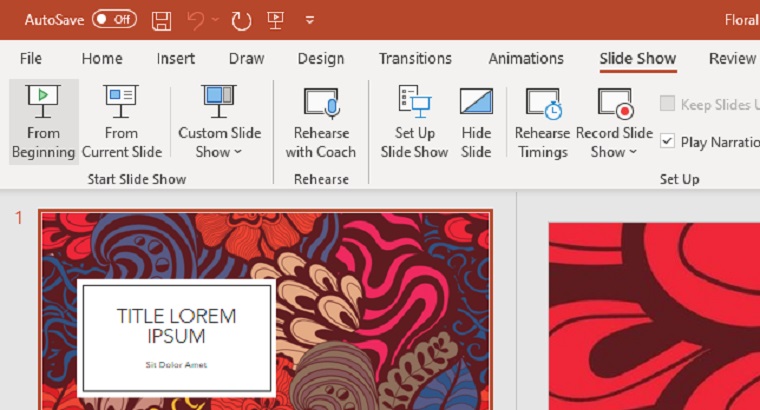
You can add audio to PowerPoint for all slides in multiple ways, but perhaps the easiest is by clicking the recording tab, clicking “Record Slide Show,” and clicking the red button to begin recording.
Before clicking the recording button, make sure that PowerPoint recognizes your microphone by moving your mouse cursor over the microphone icon in the bottom right corner.
Here’s an even easier-to-follow breakdown below for making audio recordings within PowerPoint:
- Click Recording
- Record Slide Show
- Record Button
- PowerPoint will record the PowerPoint audio narration as slides are displayed
- PowerPoint will stop recording audio once the slideshow ends.
Recording an Audio Narration For a Single Slide
If you’d like PowerPoint to read out one particular slide or section repeatedly (for example, if there is important information you’d like to emphasize), it’s best not to record PowerPoint reading out the entire slideshow. Instead, it might be better to record the voiceover for each individual slide or section that needs it. To do this, follow this step-by-step breakdown:
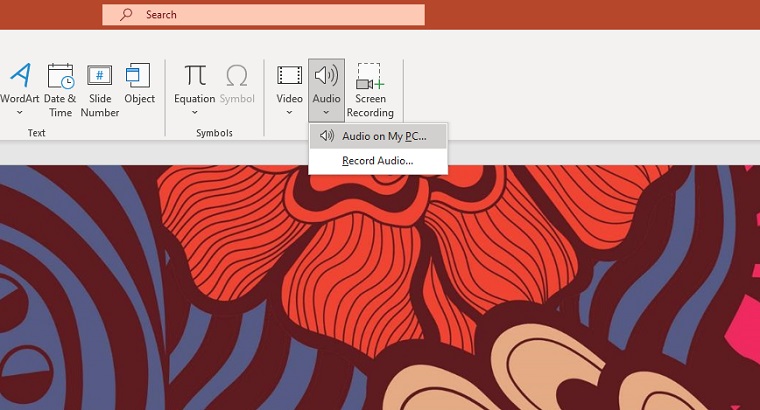
- Click Insert–> Audio–> Record Audio–> read PowerPoint through your particular slide or section–> Stop recording when finished –> Name your recording, and drag & drop onto right place in PowerPoint presentation.
Seeking Back and Forth During Your Slideshow
Another nice feature PowerPoint brings to the table is that users can quickly seek back 10 seconds or forth 10 seconds while PowerPoint reads their audio. This helps users better monitor PowerPoint reading of their material.
To do this, simply click at either end of the timeline in PowerPoint after PowerPoint has started playing back your slides. At the bottom left corner of PowerPoint, there should be a small arrow. Clicking on it will help PowerPoint jump back or forward in time to a particular point in your slideshow.
Previewing a Slide Show
After PowerPoint has been set up with voiceover, it’s important for PowerPoint users to preview the audio timings and slides together before recording an actual PowerPoint presentation.
To do this, click ‘Slide Show’ from the top menu bar–> ‘From Beginning’ –> use arrow keys to navigate through PowerPoints slide timings & voiceover–> press spacebar or Esc button when finished.
Add External Audio Files From Your PC
So now that I’ve gone over how users can record voiceovers from within PowerPoint, let’s next discuss how you can add outside pre-recorded audio files into PowerPoint presentations. These recorded audio files can be voiceovers recorded in other programs, background music files, sound effects, and any other kinds of sounds.
This process is also quite easy, as PowerPoint allows its users to import various sound files that have been saved onto your PC into a PowerPoint slide show. The supported audio types are WAV, MP3, and MID, which are luckily the most common audio file types.
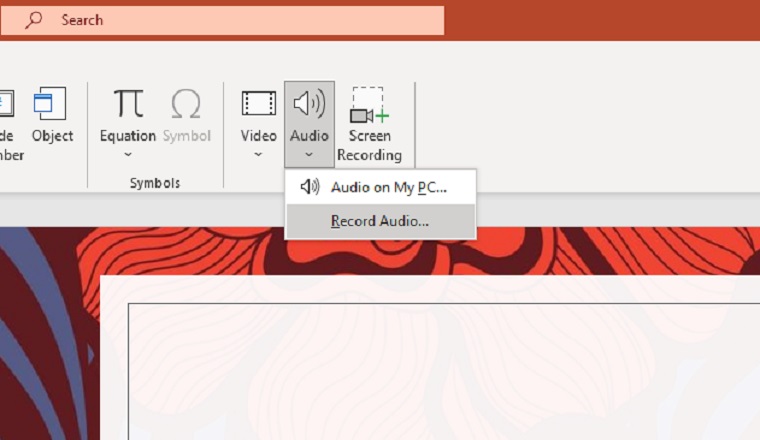
To insert your desired external audio file, first you’ll need to open your PowerPoint presentation. Click Insert–>Audio–>Audio on my PC> navigate through computer folders to find the desired audio file –> click Insert for PowerPoint to read aloud your newly imported audio file.
Changing Audio Playback Settings
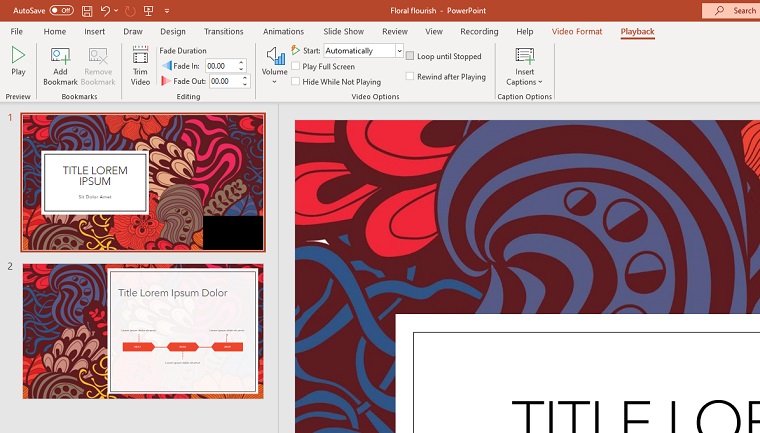
PowerPoint users have a lot of power when it comes to changing PowerPoint audio playback options, whether it is adjusting the PowerPoint voiceover’s speed, volume level, looping the audio, or playing it across Slides.
These audio options can be changed on the ‘Presenter View’ of PowerPoint.
In this view, you have a lot more power when it comes to changing PowerPoint voiceover settings, as it gives users plenty of different options: Click Playback> and select any option that you desire.
Choose to fade the audio in and out, loop the audio clip endlessly, play audio automatically, trim it to your liking, and more in the playback tab. There are tons of playback settings to comb through for your entire presentation.
Deleting Audio
If you made a mistake during the PowerPoint recording process and want to remove recorded or imported audio from your presentation, PowerPoint users can delete their audio file clips quickly by simply highlighting the entire clip in the PowerPoint slide view window and pressing delete.
5. Publish Your Presentation to Share
When you’re satisfied with how your slideshow reads aloud with voiceover, PowerPoint users can choose to publish their presentation using any one of PowerPoint’s publishing options. This allows other people to view your slideshow in its entirety or view certain sections of it with PowerPoint built-in PowerPoint reading voiceover.
Final Thoughts
Adding an audio file to PowerPoint can take your presentation to the next level, and the good thing is you don’t have to be a tech wizard to get the job done. By following the tips above, you should be able to add sounds to your PowerPoint slides with no problem.
We hope that this guide has been useful to you, and hopefully, now you’ll have a better understanding of how to add audio and voiceovers into a PowerPoint presentation!
You might also be interested in our guide on how to add a YouTube video to PowerPoint.
Have a Google Slides presentation you want to add sound to? Check out our guide on how to add audio to Google Slides.
Have any questions about how to add audio to PowerPoint? Leave a comment and we’ll help you out.
Scott is also a contributor to numerous top industry publications, including eLearning Industry and the TalentLMS Blog, as well as a trusted expert source whose analysis has been quoted and referenced in the LA Times, Fox Business, Houston Chronicle, NEA Today, and others.
- Elevating Your Virtual Presence: Why EMEET’s SmartCam S800 Stands Out in Modern Communication - 06/04/2025
- US Teachers Will Spend $3.35 Billion of Their Own Money on Classroom Expenses in 2025-25 School Year - 06/04/2025
- Report: Leveraging AI Tools Could Help US Teachers Avoid $43.4 Billion of Unpaid Overtime Work - 06/04/2025