As an educator, you’re always looking for new tools and methods to better communicate with your students. With timeline makers, like Office Timeline, you can easily create visually-appealing, engaging timelines that will help your students understand concepts more clearly.
While timelines are frequently used to deal with historical events or significant moments in the life of notable figures, now they have a variety of applications in e-learning as well.
In the guide below, we’ll lay out some of our favorite uses for timeline makers in learning environments.
10 Ways to Use Timeline Makers in Education
Here are some innovative ways you can use timeline makers (our favorite is Office Timeline) in e-Learning, whether you are a learner or an educator.
1. Create the Course’s Timeline
Most students go through information step-by-step when taking a course. So, it is better to represent those steps on a timeline as points on a learning path.
This will give students a broader picture of the course material and allow them to see how much they have progressed.
Seeing how many modules of courses have been completed can greatly motivate and encourage students to achieve their goals in the future.
Instead of a static table of contents, try creating an interactive timeline at the start of your course. Learners will be redirected to specific chapters by clicking on events of interest. Remember to connect the chapters to the main outline.
Office Timeline makes it super simple to create stylish PowerPoint timelines for your course in just minutes.
2. Track a User’s Progress Through an E-learning Course
Students can view the timelines you have included in the layout of the e-learning course to see how far they’ve progressed and what lies ahead.
This can also be used as a motivational tool, as they will be more motivated to finish the e-learning course if they can quickly see the modules they have already finished and their skill set.
They can also take a quick look at the e-learning course content they will explore in the forthcoming modules.
3. Create Timeline-Based Exams to Assess Learner Knowledge
Integrating timelines into exams or quizzes efficiently evaluates what a learner has learned from the e-learning course.
For example, you could create a blank timeline into which students will drag and drop various elements, or give them a year and ask them to write down an event that occurred during that time period.
This is a way to let students practically implement the information they’ve learned throughout the e-learning course, which allows you to determine if the knowledge has been procured and retained completely.
4. Demonstrate a Concept with Diagrams
A timeline can be a great visual tool for explaining a concept.
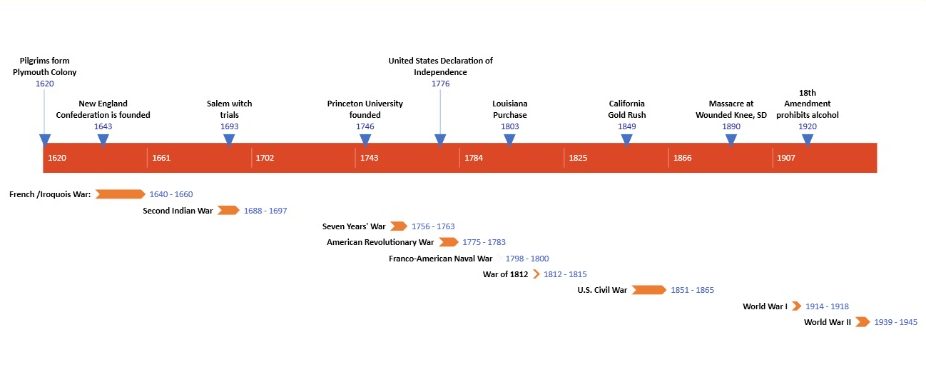
For example, you could use a diagram to show how a product has evolved over time or how an event unfolded. This will help students understand the concept more easily and retain the information for longer periods of time.
You could also use timelines in e-Learning to show the relationship between different elements. For example, you could create a Venn diagram with a timeline to show how two concepts have changed over time.
Consider your subject matter in terms of progression and sequence. There must be a specific object or element that has changed significantly over time. This could be the evolution of a product’s technological changes, fashion trends, or any other change. Aside from the date, you can also provide the names and statistics for the versions.
5. Improve the Interaction Between Scenarios and Real-World Examples
Timelines are also excellent additions to improve the interaction between scenarios and real-world examples.
You could use branching timelines to allow the learner to choose an option that leads to another extension of the timeline, or you can use a timeline to demonstrate the consequences/benefits of a specific decision.
6. Use Slide Show Timelines to Highlight Detailed Subject Matter
If you have a detailed subject that would benefit from detailed photographs or explanations, you might consider making a slide show timeline.
Each element of the timeline could be represented by a separate slide, allowing the learner to concentrate on that element of the e-learning module before progressing on to the next.
Traditional timelines provided learners with a “snapshot” view of different points along the track. However, slide shows can go into great detail about a subject.
Office Timeline lets you create PowerPoint slide show timelines for your course in just minutes.
7. Show Trends Using a Graph-Based Timeline
A graph-based timeline has been a popular e-learning timeline in recent years, especially when attempting to display rising or falling or trends statistics over time. It allows the learner to see the data in a linear format while also visually emphasizing the idea of the increase or decrease of a specific trend.
8. Prevent Cognitive Overload By Delivering “Bite-Sized” Lessons on a Timeline
One of the most significant benefits of using timelines is giving the learner small bits of information at a time.
Because students will simply be asked to absorb “bite-sized” portions of the lesson, they will avoid cognitive overload.
You can accomplish this more effectively by incorporating interactive timelines where the learner can click on specific points on the line to move to a smaller module.
9. Predict the Future
While timelines are typically used to measure the past, they can also be used to predict the future.
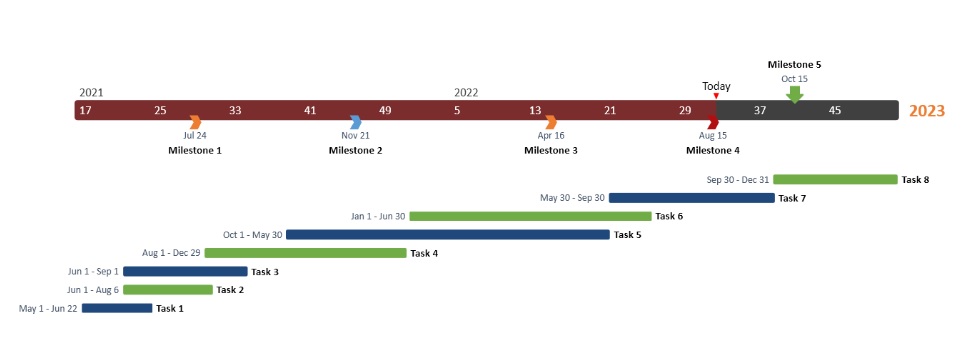
You can create a specific plan for the next month or year and a forecast for the distant future.
Timelines can be used to demonstrate the overall future of humanity, a specific industry, such as economics or medicine, or the future growth of your company.
Giving your students the task of creating a personal future timeline and then discussing the results in a virtual classroom could be a great idea.
Ask students to consider their goals in terms of time, such as next month, year, or decade.
A personal future map like this is essential for thesis students because it will aid them in making the most of their undergraduate time.
10. Describe a Specific Procedure or Protocol
Another great application for free timeline makers is visually representing a procedure, process, or protocol. Rather than only explaining textual format, you can break down the most critical steps of the process so that your students can digest the information more easily. You can also include pictures for each step to give them a more visual understanding of the tasks or techniques.
Final Thoughts on How to Use Timeline Makers in Education
Timelines can be an incredibly useful tool in eLearning, and, when used correctly, they can really enhance the overall learning experience for your students.
With a good timeline maker, you can take your courses to the next level by incorporating interactive and engaging timelines that will really capture your students’ attention.
Office Timeline is our favorite timeline maker because it’s easy to use and has all the features you need to create great-looking timelines with just a few clicks.
Click here to try Office Timeline today.
What other ways have you used timelines in education? Share your thoughts and experiences in the comments below!


