
Using GIFs in your presentations can be a great way to make things more interesting and engaging — whether you’re creating an online course, hosting a business presentation, putting on a webinar, or any other application. And as an educator, trainer, or presenter, putting some of your personality into a presentation is essential for connecting with your audience and keeping them engaged.
As someone who’s created countless eLearning experiences over the years, I use GIFs all the time in my presentations and lessons, and they work like a charm every time.
Google Slides actually makes it pretty easy to add a GIF to a presentation. In fact, you don’t even need any technical skills to add a GIF to your slideshow. In the guide below, I’ll show you exactly how to insert GIFs into a Google Slides presentation from your computer, a URL, or Google Drive with a step-by-step explanation for each of the different methods.
How to Add a GIF to Google Slides from Your Computer
One of the coolest features of Google Slides is that you can easily insert GIF files saved on your computer.
Here’s all you have to do to add an animated GIF from your computer:

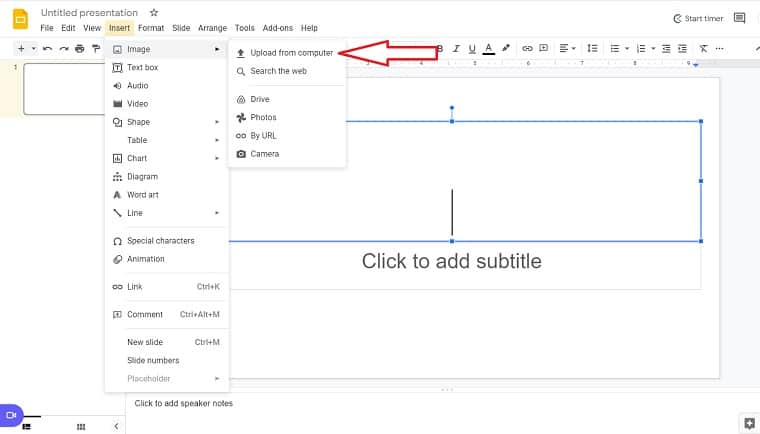
- Go to the “Insert” menu
- Select “Image.”
- Go to “Upload from Computer”
- Navigate to the folder where you have saved the GIF file and select it.
The GIF will automatically be inserted into your presentation.
You can then use the built-in tools to resize and reposition the GIF as needed.
And that’s all there is to it! With just a few clicks, you can add a GIF directly from your computer to your Google Slides presentations.
You can even add multiple GIF files and other media to a single slide if desired.
How to Add a GIF to Google Slides from a URL
If there’s a GIF online that you want to include in your Google Slides presentation, you can easily add it from the URL.
Here’s how to go about inserting a GIF from a URL:
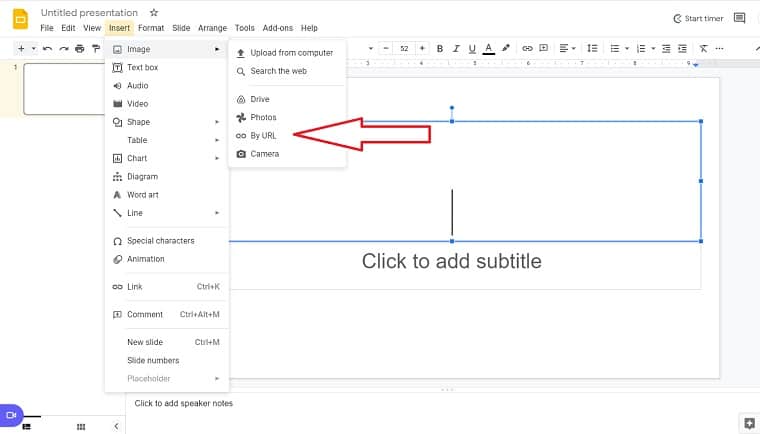
- Go to the “Insert” menu
- Select “Image”
- Choose “By URL”
- Paste in the URL of the GIF you want to add
- Click the “Select” button
- The GIF will automatically be inserted into your presentation
After that, you can use the program’s built-in features to resize and relocate the GIF as needed.
A word of caution though: embedding GIFs via a URL can be a little risky. First off, it relies on you having a stable and reliable internet connection during your presentation. If the connection messes up, your GIF might not load, which can throw things off with your presentation. But perhaps the bigger and more common issue is that the external source hosting the GIF could modify or remove the file without notice, leaving you with a broken link and no visual aid for your audience. This happens more often than you might think.
So, while adding a GIF from a URL is probably the fastest and easiest method in this list, it’s also the one with the most drawbacks.
How to Put a GIF in Google Slides from Google Drive/Google Photos
If you have a GIF saved in your Google Drive or Google Photos, you can also insert it from there into your Slides presentation.
Here’s how you can do it:
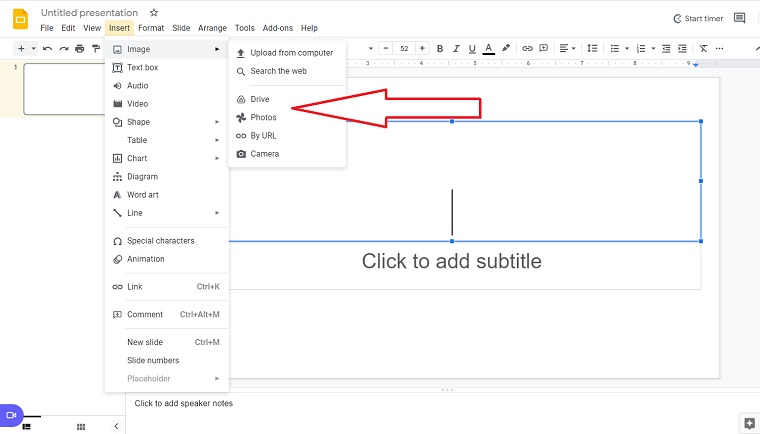
- Go to the “Insert” menu
- Select “Image.”
- In the “Upload from” drop-down menu, select “Google Drive” or “Google Photos.”
- Select the GIF you want to add.
- Click the “Select” button.
- The GIF will automatically be inserted into your presentation.
Want to resize the GIF? Just click on it and drag the corner handles to make it bigger or smaller.
Best Practices for Adding GIFs to Google Slides Presentation
Okay, by now you’ve seen how easy it is to add GIFs to your Google slideshow presentations, but before you go and start putting in all your favorite cat GIFS into your slideshows, let me offer a few tips for using this newfound power properly.
- Keep It Relevant: Make sure you choose GIFs that actually enhance your content or convey a point. In other words, don’t just include them just for the sake of animation.
- Don’t Overdo It: GIFs are a fun and visual way to enhance your presentations, but like any element, there can be too much of a good thing. Use them sparingly and thoughtfully to create a more engaging and memorable presentation.
- Keep It Short and Sweet: The best GIFs are short and get their point across quickly, so make sure the ones you use are concise. Long GIFs can be distracting and lose their impact.
- Think About Looping and Autoplay: Decide whether you want your GIFs to loop continuously or play once. It depends on the context and the effect you want to achieve.
- Test Playback: Take it from someone who’s had things go wrong in live presentations a time or two. Before your presentation, make sure you test the GIFs’ playback to ensure they work smoothly. Google Slides typically supports GIFs well, but it’s always a good practice to double check.
- Optimize File Size: GIFs can sometimes be large files, which could slow down your presentation in some cases. You might need to use online GIF compressors to reduce file size without compromising quality.
- Strive for Consistency: Maintain a consistent style and tone with your GIFs throughout the presentation. Sudden changes can be distracting.
A Final Word on Adding a GIF to Google Slides
GIFs have been around for quite a while now and they are becoming increasingly popular as a way to communicate online. And there is a good reason for this – GIFs are a great way to add some multimedia interest to your presentations and make them more engaging.
For starters, GIFs are eye-catching. They are often brightly colored and moving, which makes them hard to ignore. And because they are usually short, they can be a great way to add some energy and movement to a presentation that might otherwise be static.
GIFs can also be a great way to add some humor to your presentation. Because they are often funny or quirky, they can help lighten the mood and make your audience smile. And who doesn’t want that?
Finally, GIFs can be a great way to make a point or emphasize something important. Because they are often succinct and visual, they can help drive home a message in a way that text alone might not.
So if you’re looking for a way to make your presentations more interesting and engaging, consider using GIFs. They might just be the key to success.
With just a few clicks, you can add GIFs from your computer, a URL, or Google Drive — even if you aren’t tech-savvy.
Looking for another way to take your Google Slides presentation to the next level? Make sure to check out our guide to adding audio to Google Slides as well.
Have any questions about how to add a GIF to Google Slides? Comment below and I’ll help you out.
Scott is also a contributor to numerous top industry publications, including eLearning Industry and the TalentLMS Blog, as well as a trusted expert source whose analysis has been quoted and referenced in the LA Times, Fox Business, Houston Chronicle, NEA Today, and others.