In an increasingly global world, more and more people are choosing to learn new skills remotely. One of the easiest ways to present and learn material online is through recording videos.
Many learners respond well to visual media, so using fun, educational videos can be a beneficial learning strategy. You can even present your record videos as live events using virtual conference software.
But if you’re new to using video, you may be struggling to sync your video and your audio files for smooth, coherent presentation. As someone who’s created countless eLearning videos over the last nearly 20 years, I’m going to share some of my favorite ways to get it done.
How to Sync Video and Audio: Top Options
Here are the reviews on the best software options for audio and video synchronization. Make sure to also check out our full guide to video presentations software options.
1. Loom
Using Loom to sync audio and video, especially for creating a voiceover for a presentation or video, is a straightforward and efficient process. Here’s how you could do it:
1. Prepare Your Presentation or Video: First, have your presentation, video, or any visual material you want to showcase ready on your screen. This could be a PowerPoint presentation, a software demonstration, or any other visual content.
2. Set Up Loom for Recording: Open Loom and choose the screen recording option. Ensure that you select the correct screen or application window that you want to record.
3. Record Your Voiceover: As you start recording with Loom, play your presentation or video on the screen. Simultaneously, narrate or provide your voiceover. Loom will capture both the audio (your voice) and the video (your screen) in real-time.
4. Utilize Loom’s Features: Take advantage of Loom’s features such as pausing and resuming the recording if you need a moment to collect your thoughts or prepare for the next section of your presentation.
5. Editing: After recording, Loom allows for basic editing. If there are sections where the audio and video are not perfectly in sync, you can trim these parts out. However, for more complex editing, you might need to use additional video editing software.
6. Share or Export Your Video: Once you’re satisfied with the recording, you can share it directly from Loom or download it for further use or editing in another program.
This method is particularly useful for creating instructional videos, tutorials, or professional presentations where you need to explain visual material. Loom’s simplicity and ease of use make it an excellent tool for syncing audio and video without the need for complex video editing skills.
Features

- Screen & Camera Recording: Capture your screen, webcam, or both simultaneously.
- HD Video Quality: Recordings are in high-definition for clear visuals.
- Instant Sharing: Share videos instantly with a link.
- Video Trimming: Edit your videos by trimming out unnecessary parts.
- Custom Thumbnails: Choose or upload a custom thumbnail for your video.
- Drawing Tool: Highlight or draw on your screen while recording.
- Viewer Insights: Track who watched your video and for how long.
- Comments and Reactions: Viewers can leave comments and reactions on videos.
- Privacy Controls: Control who can view your video with privacy settings.
- Integration with Popular Tools: Integrate with tools like Slack, Gmail, and more.
- Unlimited Storage: Store all your videos on Loom’s cloud without any storage limit.
- Closed Captions: Automatically generated and editable closed captions for accessibility.
- Noise Suppression: Reduce background noise in your recordings.
Click here to try Loom for free.
2. Camtasia
![]()
Camtasia is a software option that allows you to use a Microsoft PowerPoint plugin to create video presentations. You can also use a direct screencast to create great videos of your presentations! It is perfect for tutorials and other educational materials.
Download Camtasia here!
Features
- Pre-built video templates
- Whiteboard animation software capabilities
- Simplified editing
- Webcam capture
- Music
- Interactivity and quizzing
- Green screen
- Closed captions
System Requirements
- Microsoft Windows 10 (64-bit) 1607 version or later or macOS 10.13
- 2.8 Ghz 6th Generation Intel® Core™ i3 Processor with 2 CPU Cores or 2.8 Ghz 1st Generation AMD® Ryzen™ 3 Processor with 2 CPU Cores
- 8GB of RAM
- 4GB of available disk space
- 1366×768 monitor resolution
User Feedback
“It has just enough features/capabilities where you don’t feel like you’re missing anything key, but also isn’t bogged down by super granular customization.”
In this video, an expert gives great tips on how to use audio and video cues while recording to make it easier to sync your images and sounds perfectly.
This tutorial by Cam Answers is perfect for beginners looking to use Camtasia for the first time. You’ll learn how to access and use all of the different features of the program to get optimum results. The video pays particular focus to using Camtasia tools to sync audio and video.
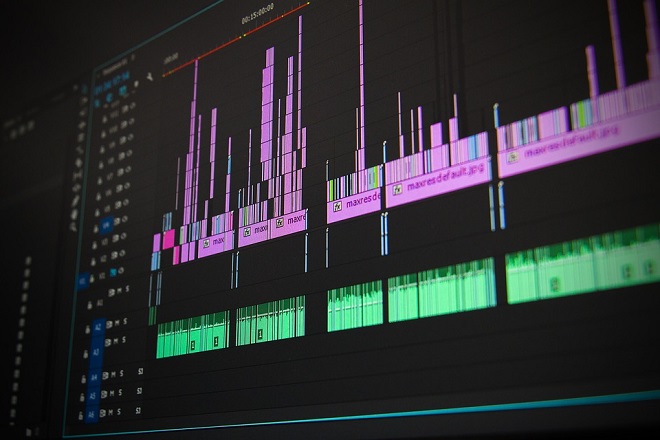
3. Premiere Pro
![]()
Premiere Pro is an Adobe product used for editing video and sound. The software operates by allowing you to create a timeline for your videos, making it simple to edit and sync every aspect of your video.
Download Premiere Pro here!
Features
- Color management
- Quick export
- Import from any file format
- Trim footage precisely
- Add animations
System Requirements
- Intel® 6th Gen or newer CPU – or AMD Ryzen™ 1000 Series or newer CPU
- Microsoft Windows 10 (64-bit) version 1803 or later or macOS v10.14 or later
- 8 GB of RAM
- 2 GB of GPU VRAM
- 8 GB of available hard-disk space
- 1280 x 800 monitor resolution
User Feedback
“The program offers complete control over the videos with powerful features for any kind of editing. A novice can get in and import video, separate, edit, add text and splice very easily. Also the expert can make masterful edits for professional use in all different kinds of media.”
If you’re new to Premiere Pro, this is the tutorial for you! In this tutorial, you’ll learn the easiest method for syncing audio and video in a few simple steps using the Premiere Pro software.
For more advanced sound and video editing and syncing, Andrew Kan has the perfect tutorial. This video goes in-depth into the tools and features that are available in Premiere Pro. Following his tutorial, you can produce high-quality audio syncing for any video.
4. VideoPad
![]()
VideoPad is also designed for the average user; with an intuitive user interface, everyone from beginners to professionals can create professional-quality video quickly and easily. To get the most out of the software, you can add plugins for other NCH products.
Download VideoPad here!
Features
- Drag and drop video clips
- Effects and transitions
- Fast processors
- Fine-tune color
- Share directly to YouTube
- Video stabilization
System Requirements
Windows 7 and above or Mac OS X 10.5 or above
User Feedback
“I love that I can layout my videos on layers, something that the big players on the market have (being the heaviest and most expensive) but the simplest don’t.”
The VideoPad software is frequently used for music videos and podcasts. This tutorial gives a quick rundown of the tools and processes that you can use in the software to pull together video and audio for your video.
This is a much more straightforward tutorial, giving a basic overview of how to combine audio and video using VideoPad. This tutorial focuses more on the basic process and less on the intricacies of perfectly syncing your sound.


5. iMovie
![]()
iMovie was designed by Apple as a simple way for iPhone and iPad users to create stunning videos quickly and easily. This software allows you to easily add animations and other effects to your videos so you can dazzle friends and family.
Download iMovie here!
Features
- Unique templates and themes
- Soundtracks
- Video filters
- Green screen and split screen
- Create Hollywood-style video trailers
System Requirements
External display support requires iPhone 7 or later, iPad (6th generation) or later, iPad Air 3 or later, iPad Pro 12.9-inch (2nd generation) or later
User Feedback
“I have been having an absolute blast with this, especially since I’ve really gotten into drone photography and it’s the perfect tool to make for video editing. My favorite feature honestly is making the movie trailers, it’s so fun with a compilation of media. The ONLY issue I have with it is that I’d love more freedom. Once you pick the general theme it predetermines what you can do.”
In this tutorial, you’ll learn how to quickly and easily synch audio and video in iMovie. However, you’ll also get some great pro tips to make your video editing project a breeze.
For a more in-depth and detailed look at iMovie’s capabilities, check out Keithron Powell’s tutorial. With his tips and tricks, you can edit like a pro!
6. FinalCut
![]()
FinalCut is a software designed for quick project turnaround. It allows you to edit in a nonlinear fashion on highly complex projects without getting bogged down by a complicated user interface.
Download FinalCut here!
Features
- Accelerated rendering
- Multi-camera editing
- Advanced color grading
- 2D and 3D motion graphics
- Multi-channel audio edition
System Requirements
- MacOS 10.15.6 or later
- 4GB of RAM (8GB recommended for 4K editing, 3D titles, and 360° video editing)
- Metal-capable graphics card
- 1GB of VRAM recommended for 4K editing, 3D titles, and 360° video editing
- 3.8GB of available disk space
User Feedback
“I like the simplicity of the interface and I appreciate the more powerful features co-existing in one app. Typically it is one or the other. We can onboard a new editor in FCPx and they are productive within a couple of days thanks to the intuitive Ux. There are also more powerful tools and capabilities that more experienced editors might appreciate.”
Not a lot of software options can sync audio and video automatically. However, with this tutorial, you can learn how to set up your FinalCut software to sync your audio automatically!
For a more in-depth look at the tools and resources available in FinalCut, check out this tutorial by Will Chidlow. By following his guidance, you’ll unlock all of the best features that the software has to offer.
7. Wondershare Democreator
![]()
Wondershare Dreamcreator is one of the best software options available for screen recording. Professional gamers regularly use this product to make videos of their gameplay to share with millions of viewers. The software also provides a comprehensive suite of editing tools so you can tweak your videos until they’re perfect.
Download Wondershare Democreator here!
Features
- 4K video quality
- Green screen
- Noise removal
- Caption tools
- Voice-over
- Video speed control
System Requirements
- Windows 7 or later 64-bit
- Intel i3 or better multicore processor, 2GHz or above
- At least 3GB physical RAM (8GB required for HD and 4K videos)
- 1366×768 or better screen resolution
- 2GB free hard-disk
User Feedback
“Wondershare DemoCreator can deliver stunning performance and offer awesome video recording and editing experience to its end-users even though they belong to any niche in this modern era. This software is the best and ideal choice if you have a concern with the video content. You can download Wondershare DemoCreator and give it a try.”
Sometimes, you need to make edits to your sound separately from the video. This tutorial will show you how to detach your sound file using Wondershare Democreator, edit the file, and then re-sync it with the video.
8. VSDC
![]()
If you’re looking for a way to edit videos without a hefty price tag, VSDC might be the answer. This software is available as a free download and can edit large, high-resolution videos in a snap.
Download VSDC here!
Features
- Non-linear video editor
- Visual and audio effects
- Color blending
- Masking effects
- Motion-tracking
- Subpixel accuracy
- Video stabilization
System Requirements
- Microsoft Windows XP SP3 or later
- Intel, AMD or compatible processor with the work frequency at 1.5 GHz or higher
- 1024×768 pixels with 16-bit color or higher
- 1 GB RAM
- Microsoft DirectX 9.0с or higher
- At least 300 MB of free disk space
User Feedback
“You can’t beat the capabilities for the price. You can make many of the important adjustments for a basic video, as well as layering both video and audio clips and incorporating transitions.”
With VSDC, precision is key. This tutorial will show you how to use VSDC’s tools to precisely target specific points in your video and sync them exactly to the soundtrack.
9. FlexClip Audio Sync App Online
![]()
FlexClip is another great free option for editing videos. With this product, you can edit your videos directly on the webpage without having to download anything. The product is designed to be simple, yet comprehensive, so even beginners can create high-quality videos in a snap.
Download FlexClip Audio Sync App Online here!
Features
- Trim, merge, and split videos
- Text animations
- Voiceover capabilities
- Add logo or watermark to videos
- Upload background music
System Requirements
- Windows 10 version 14316.0 or higher
- 4 GB memory
User Feedback
“FlexClip is a solid platform for editing videos. It comes at a very reasonable price, too. We use it to create promotional materials in our company.”
This is a great tutorial for anyone who is new to online video editing. You’ll learn about all of the tools available in FlexClip to create professional-grade videos.
10. Kapwing
![]()
Kapwing is commonly used for creating viral memes and GIFs. However, Kapwing also has a host of options for creating amazing videos with a simple online video editor. Many of the tools are available online for free, so you can make great videos without a hefty price tag.
Download Kapwing here!
Features
- Combine videos
- Add captions
- Add audio to video
- Green screen
- Trim and resize videos
System Requirements
Windows, Mac, Linux, Cloud, iPhone, iPad, or Android.
User Feedback
“Love Kapwing. I’ve never made videos before, but I feel like I can with Kapwing for the first time. Not intimidating – really fast to get going.”
Kapwing has tons of tools that you can use to create amazing videos. This tutorial focuses on the tools necessary to perfectly sync audio and video.
11. Corel VideoStudio® Pro

Corel VideoStudio® Pro has a drag-and-drop video editing that makes creating videos fun and easy. There are hundreds of titles, filters, effects, graphics, and transitions. The editing tools are intuitive. There are instant project templates to use to create unique movies with your content quickly.
Download Corel VideoStudio® Pro here!
Features
- Easily crop, trim, and split video on an exact timeline moment.
- Rotate the video or change its aspect ratio.
- Correct imperfections to remove fisheye distortions from a wide angle lens, adjust color, and change light temperatures.
- Select from many instant project templates to easily get started.
- Add transitions and filters with drag-and-drop video editing.
- Look up table (LUT) profiles can change day into night or recreate color schemes of iconic movies.
- Boost colors and brighten scenes.
- Adjust hue, saturation, and white balance manually or by using an auto-tune adjustment.
System Requirements
- Operating System: Microsoft® Windows® 7/8/10, 64-bit only.
- Processor: Core i3 or AMD A4, Intel core i7 or AMD Athlon A10.
- RAM: 4Gb or higher 8GB recommended.
- Graphics Card: Minimum 512 MB VRAM.
- Display: 1024×768.
- Hard Drive: Minimum 6 GB for installation.
User Feedback
“I produce music videos, and this system has some amazing special effects.”
H. White.
This video, produced by Corel VideoStudio, shows a brief overview of how easy it is to use this video editor.
The Corel VideoStudio can be used with the easy project start templates and overlays to create an impressively good-looking video in just a few minutes. The short video is mostly hype, but it does show some cool videos made with this editor.
12. Movavi Video Suite

The Movavi Video Suite can be used to make videos, edit them, convert different video files and media file formats, do screen recording, and more. It is the perfect tool for remote work, video blogging, and creating distance learning projects. There is a free trial.
Download Movavi Video Suite here!
Features
- It is easy to create intros, use the chroma key, add transitions, and special effects.
- Store all your media in the media library.
- The program interface adapts to your preferences.
- Quickly converts files from one format to another.
- Edit videos, slideshows, and audio.
- Burn CDs or DVDs.
- Offers WI-FI file transfers from multiple devices.
- Has an online community of videographers sharing tips and tricks.
System Requirements
There is a Windows version and a Mac version.
Windows Version
- Operating System: Microsoft® Windows® 7/8/10.
- Processor: 1/5 GHz dual core processor such as Intel®, AMD®.
- RAM: 2 GB.
- Graphics Card: AMD Radeon™ R600, Intel® HD Graphics 2000, NVIDIA® GeForce® series 8, or higher graphics card.
- Display: 1280×768, 32-bit color.
- Hard Drive: 830 MB for installation and 500 MB for regular usage.
Mac Version
- Operating System: Mac OS X® 10.10 or higher.
- Processor: 64-bit Intel® processor.
- RAM: 256 MB.
- Graphics Card: AMD Radeon™ R600 Mobility Radeon™ HD 4330, Mobility FirePro™ series, Intel® HD Graphics 2000, NVIDIA® GeForce® series 8 and 8M, Quadro FX 4800, Quadro FX 5600, Radeon™ R5 M230 or higher graphics card.
- Display: 1280×768, 32-bit color.
- Hard Drive: 800 MB for installation and 500 MB for regular usage.
User Feedback
“I love the Movavi videos editing tools and have used them both on a PC and a Mac.”
R. Moda
In this video produced by JustAlexHalford, he shows how to use the Movavi Video Editor Plus 2021.
This video is a tutorial that shows the new features of the Movavi video editor, the interface, and the functions. He shows how easy it is to use this versatile video editor. He shares a few tips and tricks on how to make your videos look more interesting.
13. CyberLink PowerDirector 365

CyberLink PowerDirector 365 is part of a full set of image, audio, and video editing tools, including PhotoDirector, AudioDirector, and ColorDirector. This is one of the fastest video editors with over 3,000 special effects. It supports the latest formats of Ultra HD 4k HEVC H.265.
Download CyberLink PowerDirector 365 here!
Features
- Intuitive interface.
- New special effects.
- Constantly-growing resource library with templates, background music, and sound effects.
- Cloud-based editing tool sold on a monthly subscription.
- Integrated photo and video editing using PhotoDirector with PowerDirector.
- Theme templates.
- LUT color presets.
- Motion graphic titles.
- Multilanguage support in eight languages.
System Requirements
There is a Windows version and a Mac version.
Windows Version
- Operating System: Microsoft® Windows® 7/8, 8.1/10, 64-bit only.
- Processor: AMD Phenom® 11 and above, Intel® i-series.
- RAM: 4 GB required, 6 GB recommended.
- Graphics Card: 128 MB VGA VRAM graphics card, Direct X 11 compatible. AI plug-in requires 2 GB VGA VRAM or better.
- Display: 1280×768, 16-bit color or better.
- Hard Drive: 7 GB.
Mac Version
- Operating System: Mac OS X® 10.14 or higher.
- Processor: Apple M1 with Rosetta support, Intel® i-series.
- RAM: 4GB, 6 GB recommended.
- Graphics Card: A128 MB VGA VRAM or higher graphics card.
- Display: 1280×768, 16-bit color.
- Hard Drive: 7 GB.
User Feedback
“I saw the sterling review on Techcrunch before I decided to get this software. I am very happy with this video editor and got up to speed quickly.”
J. Baret
14. MAGIX Movie Edit Pro

The MAGIX Movie Edit Pro is simple enough for beginners to use and has plenty of outstanding features that please the pros. There are Plus and Premium versions available that have more features. It works with an intuitive storyboard and flexible timeline that allows video editors to complete projects up to twice as fast as before. There is a free trial.
Download MAGIX Movie Edit Pro here!
Features
- Includes 900 effects, titles, templates, and transitions. The Pro Premium version includes over 1,500 effects.
- Easy color correction.
- Professional stabilization of images.
- Burns DVDs and Blu-ray discs.
- Faster performance with the new Infusion video editing engine.
- Works with 8K Ultra HD video files.
- The Pro Plus version includes multi-cam editing.
- The Pro Premium version includes NewBlue Filter 5 Ultimate.
System Requirements
This software only works on PCs running Windows OS.
- Operating System: Microsoft® Windows® 8/10, 64-bit only
- Processor: Quad-core with 2.4 GHz or better (2.8 GHZ required for 8K HD editing).
- RAM: 4 GB or better.
- Graphics Card: 512 MB VRAM with DirectX 11 support
- Display: 1280×1024.
- Hard Drive: 2 GB for program installation.
User Feedback
“I used this video editing software for many years and love it. It works with 8K HD files that other software cannot handle.”
P. Greebe
This video produced by MAGIX is an introductory tutorial.
Watch the video to learn how to create a new project, import videos, and play them using different methods. Then, you will learn how to do the most important edits. Finally, the video shows how to export video files and burn them to a DVD.
Final Thoughts
If recording video is new to you, there are a lot of great resources to help you get started. If you frequently use Google Slides, you might consider making those presentations into videos. Check out this article to learn all about recording over Google Slides. If you want to make your videos even more polished and professional, this article can help you edit out those distracting breathing noises. Now get out there and start creating!
I updated this article in June 2021 to add five more software choices for you to consider. My favorite of the new ones is the MAGIX editor because it works with the 8K HD files. The 8K high-definition video format is stunningly beautiful.
Scott is also a contributor to numerous top industry publications, including eLearning Industry and the TalentLMS Blog, as well as a trusted expert source whose analysis has been quoted and referenced in the LA Times, Fox Business, Houston Chronicle, NEA Today, and others.